代码清洗大战:”abstract” classes should not have “public” constructors

Sonarqube给出了一个修饰符的使用建议,不得不说,sonarqube扫描的还是很全面的,真的是面面俱到,不放过任何一个细节!

————sonarqube 提示开始———–

Since abstract classes can’t be instantiated, there’s no point in their having public or internal constructors. If there is basic initialization logic that should run when an extending class instance is created, you can by all means put it in a constructor, but make that constructor private or protected.

Noncompliant Code Example

abstract class Base{    public Base() // Noncompliant, should be private or protected    {      //...    }}

Compliant Solution

abstract class Base{    protected Base()    {      //...    }}

————sonarqube 提示结束———–

点评:不作任何点评!你平时会注意这个细节么?欢迎留言写出你的感受!

发表在 未分类 | 留下评论

always evaluate to false some subsequent code is never executed

拿Sonarqube扫码老代码,是一场历练!大多数情况下,sonarqube都能提出合理的修改建议,只是有的时候,验证不出sonarqube指出的问题。来来来,看一个今天抓到的“粒子”!

————sonarqube 提示开始———–

Change this condition so that it does not always evaluate to ‘false’; some subsequent code is never executed.

Conditional expressions which are always true or false can lead to dead code. Such code is always buggy and should never be used in production.

Noncompliant Code Example

a = false;if (a) // Noncompliant{  DoSomething(); // never executed}if (!a || b) // Noncompliant; "!a" is always "true", "b" is never evaluated{  DoSomething();}else{  DoSomethingElse(); // never executed}
  • Exceptions

  • This rule will not raise an issue in either of these cases:
  • When the condition is a single const bool
const bool debug = false;//...if (debug){  // Print something}
  • When the condition is the literal true or false.

In these cases it is obvious the code is as intended.

See

  • MISRA C:2004, 13.7 – Boolean operations whose results are invariant shall not be permitted.
  • MISRA C:2012, 14.3 – Controlling expressions shall not be invariant
  • MITRE, CWE-570 – Expression is Always False
  • MITRE, CWE-571 – Expression is Always True
  • CERT, MSC12-C. – Detect and remove code that has no effect or is never executed

————sonarqube 提示结束———–

怪怪的

sonarqube有图有真像,差点就相信了,赶紧做个小实验验证一下Sonarqube的提示。

using System;using System.Collections.Generic;using System.Linq;using System.Text;using System.Text.RegularExpressions;namespace TestStringIsNullOrEmpty{    class Program    {        static void Main(string[] args)        {           // Console.WriteLine(String.Format("null {0}", CheckEmail(null)));            Console.WriteLine(String.Format("空 {0}", CheckEmail("")));            Console.WriteLine(String.Format("hello@yue.ma {0}", CheckEmail("hello@yue.ma")));            Console.ReadLine();        }        public static bool CheckEmail(string email)        {            string[] emailList = email.Split(';');            if (emailList.Length > 1)            {                return false;            }            if (string.IsNullOrEmpty(email))            {                return false;            }            return true;        }    }}

结果:

Falsehello@yue.ma True

传null会报错,进不到string.IsNullOrEmpty(email),但是传空字符的时候,抵达了string.IsNullOrEmpty(email),传正常邮箱地址,也抵达了string.IsNullOrEmpty(email),false,true都有返回。

实验结果:

sonarqube开了个玩笑!写代码,写出好代码,sonarqube是一个不错的助手工具,然而,还得结合实际情况再考虑清楚,目前至少发现sonarqube几个不适当的提示了!关注公众号,查收更多sonarqube代码检查小知识经验!

点评:有选择性的忽略sonarqube建议,不要被sonarqube带沟里!你平时会注意这个细节么?欢迎留言写出你的感受!

发表在 未分类 | 留下评论

FileStream dispose twice | SQ查代码’stream’ will be disposed twice

Sonarqube就是一个不会烦的“好同事”,每一行代码有没有bugs,有没有坏味道,都能查得一清二楚,再“恶心”代码也能在sonarqube的调教下变得更加优质​。今天见到两个 Using嵌套的写法,看起来没有什么问题,但是sonarqube还是提示​坏味道。来看看怎么回事​吧!

第一种写法

           using (FileStream fs = new FileStream(GetPath(fileName), FileMode.CreateNew, FileAccess.Write, FileShare.ReadWrite, 1024))            {                using (StreamWriter sw = new StreamWriter(fs, Encoding.UTF8))                {                                      sw.WriteLine("hello world");                    sw.Flush();                    sw.Close();                }                fs.Close();            }

第二种写法

           using (FileStream fs = new FileStream(GetPath(fileName), FileMode.CreateNew, FileAccess.Write, FileShare.ReadWrite, 1024))            {                using (StreamWriter sw = new StreamWriter(fs, Encoding.UTF8))                {                    sw.WriteLine("hello world");                    sw.Flush();                }            }

无论是第一种写法,还是第二种写法,sonarqube都会提示:

A proper implementation of IDisposable.Dispose should allow for it to be called multiple times on the same object, however this is not guaranteed and could result in an exception being thrown.It is best not to rely on this behaviour and therefore make sure an object is disposed only once on all execution paths. This is particularly true when dealing with nested using statements.
Refactor this code to make sure 'fs' is disposed only once.

sonarqube给出的参考提示:

Noncompliant Code Example

using (Stream stream = new FileStream("file.txt", FileMode.OpenOrCreate)){    using (StreamWriter writer = new StreamWriter(stream))  // Noncompliant: 'stream' will be disposed twice    {        // Use the writer object...    }}

Compliant Solution

Stream stream = null;
try
{
    stream = new FileStream("file.txt", FileMode.OpenOrCreate);
    using (StreamWriter writer = new StreamWriter(stream))
    {
        stream = null;
        // Use the writer object...
    }
}
finally
{
    if(stream != null)
        stream.Dispose();
}

有没有感觉按sonarqube提示改完之后,都有一种“改错”的感觉,改完之后,代码看起来没有之前美观了~

进来就设置为null,后面能成功?​赶紧来看小实验。

using System;using System.Collections.Generic;using System.IO;using System.Linq;using System.Text;namespace ConsoleApplication1{    class Program    {        private static string directory = System.Configuration.ConfigurationSettings.AppSettings["Directory"];        static void Main(string[] args)        {            StoreFile();            ReadFile("txt.txt");            Console.ReadLine();        }        /// <summary>        /// 获取完整路径        /// </summary>        /// <returns>完整路径</returns>        private static string GetPath(string fileName)        {            if (directory[directory.Length - 1].Equals('\\'))            {                return string.Format("{0}{1}", directory, fileName);            }            else            {                return string.Format("{0}\\{1}", directory, fileName);            }        }        public static void StoreFile()        {            FileStream fs = null;            try            {                fs = new FileStream(GetPath("txt.txt"), FileMode.CreateNew, FileAccess.Write, FileShare.ReadWrite, 1024);                using (StreamWriter sw = new StreamWriter(fs, Encoding.UTF8))                {                    fs = null;                    sw.WriteLine("hello world!");                    sw.Flush();                }            }            finally            {                if (fs != null)                {                    fs.Dispose();                }            }        }        public static void ReadFile(string fileName)        {            FileStream fs = null;            try            {                fs = new FileStream(GetPath(fileName), FileMode.Open, FileAccess.Read, FileShare.ReadWrite, 1024);                using (StreamReader sr = new StreamReader(fs, Encoding.UTF8))                {                    fs = null;                    Console.WriteLine(sr.ReadToEnd());                }            }            finally            {                if (fs != null)                {                    fs.Dispose();                }            }        }    }      }

实验显示,按sonarqube提示调整完代码后,文件读写正常
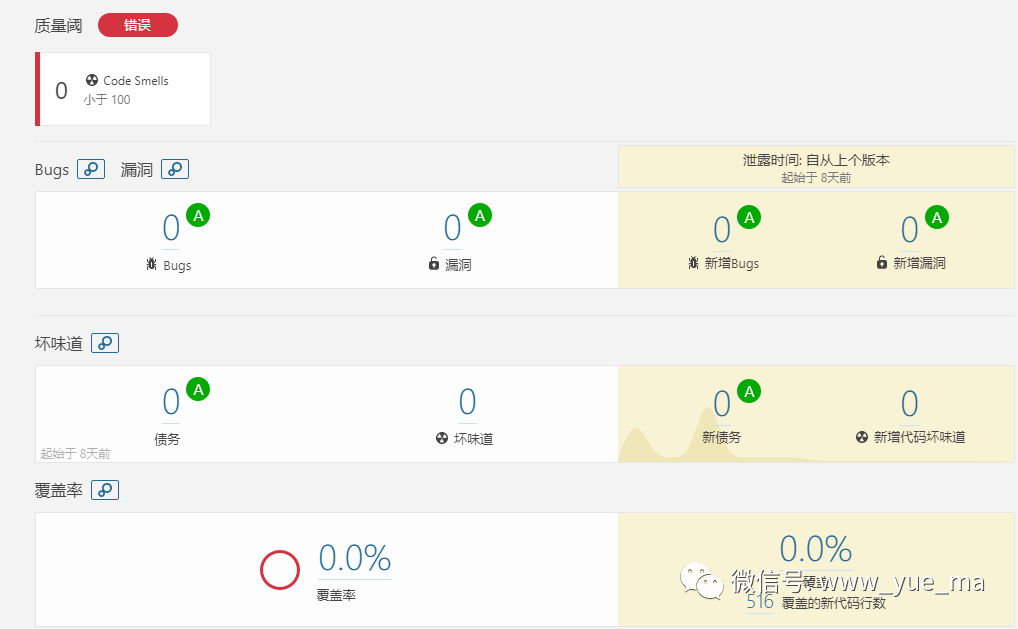
后​记:推荐一下sonarqube,能扫描代码,并从bugs、坏味道、重复率三个维度给出代码质量结果,内置N种代码规范,有效提升团队代码质量​!从程序自动检查代码​!

有没有心动的感觉,赶紧行动起来,为自己的团队部署一下sonarqube,开启一场惊天动地的代码质量优化之旅吧!​

巧妙拆分bolt提升Storm集群吞吐量

技术岛公众号

技术岛公众号

发表在 未分类 | 留下评论

命名空间“System.Runtime.CompilerServices”中不存在类型或命名空间名称“ITuple”

今天处理单元测试的时候遇到一个很奇怪的问题,翻出去找了找​,还真找到了。直接整理出来,可以参考使用!非常适合正在整理单元测试的​同行!​

出问题:

<Fakes xmlns="http://schemas.microsoft.com/fakes/2011/">  <Assembly Name="mscorlib" Version="4.0.0.0"/></Fakes>

命名空间“System.Runtime.CompilerServices”中不存在类型或命名空间名称“ITuple”(是否缺少程序集引用?)

解决问题:

<Fakes xmlns="http://schemas.microsoft.com/fakes/2011/">  <Assembly Name="mscorlib" Version="4.0.0.0"/>  <StubGeneration>    <Remove FullName="System.Runtime.CompilerServices.ITuple"/>  </StubGeneration></Fakes>

解决​方案来源:

https://developercommunity.visualstudio.com/content/problem/236081/the-type-or-namespace-name-ituple-does-not-exist-i.html

发表在 未分类 | 留下评论

Java+Json+Boolean=坑货 人在江湖,身不由己 一个小实验找出路 Java Boolean有点设计过头了

接收前端的JSON数据,接收.net接口的JSON数据,遇到IsOpen,IsValid,解析不出来!遇到鬼似的~~一个小实验,找到出路!

实验数据准备

直接在浏览器的console里,输入

JSON.stringify({IsOpen:true,IsValid:false})//得到实验串
 //大概放到变量里是这样    //String json = "[{\"IsOpen\":true,\"IsValid\":false},{\"IsOpen\":true,\"IsValid\":true}]";    String json =  "{\"IsOpen\":true,\"IsValid\":true}";

准备简单工程

建一个纯净的java工程,快速调试,不然时间都浪费在编译上了。

main方法

public class BootMe {  @SuppressWarnings("unused")  public static void main(String[] args) throws InterruptedException, IOException {    //String json = "[{\"IsOpen\":true,\"IsValid\":false},{\"IsOpen\":true,\"IsValid\":true}]";    String json =  "{\"IsOpen\":true,\"IsValid\":true}";    JsonBean result = (JsonBean) JSON.parseObject(json, JsonBean.class);    JsonBean result1 = new ObjectMapper().readValue(json, JsonBean.class);    System.out.println(json);    System.out.println("==after==");    System.out.println(JSON.toJSONString(result));    System.out.println(new ObjectMapper().writeValueAsString(result));    System.out.println(new ObjectMapper().writeValueAsString(result1));        System.out.println("==end==");  }}

Bean

package cn.test;import com.fasterxml.jackson.annotation.JsonProperty;import lombok.Data;@Datapublic class JsonBean {  @JsonProperty("IsOpen")  private boolean open;  @JsonProperty("IsValid")  private boolean valid;  public void setIsValid(boolean valid) {    this.valid = valid;  }}

实验结果

{"IsOpen":true,"IsValid":true}==after=={"open":false,"valid":false}{"IsOpen":false,"IsValid":false}{"IsOpen":true,"IsValid":true}==end==

实验操作组合就不细化了,实验的结论是

一、如果使用JSON.parseObject,或希望controller正常接收到类似isValid的参数值,可以采用以下方式定义Bean

package cn.test;import com.fasterxml.jackson.annotation.JsonProperty;import lombok.Data;@Datapublic class JsonBean {  private boolean valid;}public void setIsValid(boolean valid) {    this.valid = valid;}

二、使用希望使用@JsonProperty(“IsValid”),来解决此问题,请使用ObjectMapper。

本实验所用到的POM包

         <dependency>            <groupId>com.alibaba</groupId>            <artifactId>fastjson</artifactId>            <version>1.2.4</version>        </dependency>     <!-- json -->            <dependency>                <groupId>com.fasterxml.jackson.core</groupId>                <artifactId>jackson-databind</artifactId>                <version>2.7.3</version>            </dependency>            <dependency>                <groupId>com.fasterxml.jackson.core</groupId>                <artifactId>jackson-core</artifactId>                <version>2.7.3</version>            </dependency>            <dependency>                <groupId>com.fasterxml.jackson.core</groupId>                <artifactId>jackson-annotations</artifactId>                <version>2.7.3</version>            </dependency>

感受

java的boolean设计,有点过度设计了,设计者以自身的想法为boolean增加了有区于其他类型的特性,然后被无数人踩坑~受不了的人就再立门户,出新语言了!

技术岛公众号

技术岛公众号


发表在 未分类 | 留下评论

敏感词算法坏味道修复经验分享 Sonarqube代码质量修复的过程是一个思考历练的过程 权衡代码可读性可维护性与性能的平衡点

​一般的坏味道都比较好处理,像变量名大小写、立即返回结果、去掉多余的boolean判断等等,常规类型的坏味道清理起来很快,按sonarqube的提示,​很快就可以搞定。有一些,坏味道,可能就不用处理​,​这个看团队怎么排除一些sonarqube的不合理的地方。通过运用设计模式啊,运算啊,都很可能产生“花瓶”代码,像状态机,就产生了很多空的占位方法,sonarqube会报重复率,这个时候,可以忽略掉,不予以处理。

今天最虐心的是敏感词算法坏味道,这个算法拥有强大的复杂度,while,for,if嵌套层次多,被sonarqube要求降低复杂度。

困境

这么精致的代码,改错一行,估计就​凉凉了。无从下手,在于,代码本身的可读性就差,代码都在一个方法里,远超一屏代码,读懂就比较费劲​。算法运用了不少全局性质的哨兵变量​。

inTag;i;start;count;isBack;offset;target;branch;chars;

​理不清,还乱!

顿悟

放空许久后,突然有点灵感​。sonarqube要求降低方法的复杂度,无非要求别把代码堆在一个方法里,将方法合理的拆成多个,把单个方法的while,for,if层级降低​。全局性质的变量,要在多个方法间传递,那就打包到一个context中,然后就可以任性的降低sonarqube所谓的复杂度了。

@Datapublic class ContextBean {  private int inTag;  private int i;  private int start;  private int count;  private boolean isBack;  private int offset;  private String target;  private SmartForest<String[]> branch;  private char[] chars;  public void plusI(){    i++;  }}

顺势而为

有了context,接下来就是拆分层级​了。先抽出来一个dealChars,再从dealChars中抽出来一个dealChar,再从dealChar中抽出来一个judageChar,单个方法的复杂度也达到sonarqube要求了。代码可读性好像也提升了。算法并来就不好读~^_^

收尾

经过今天敏感词算法的坏味道洗礼,总结出一个对于复杂度高的算法代码的坏味道修复经验,建立一个 context,将变量打包进去,再将算法拆成多个方法,降低单个方法​复杂度。

发表在 未分类 | 留下评论

官方文档防坑批注|开始使用 Jenkins-Jenkins官方文档-用户文档中心

官方文档好入门,也是自带坑的,所以对官方文档进行了防坑标注!

标黄的是批注的,无特殊说明,都是jenkins官方文档!


本导读将向您介绍使用 Jenkins、Jenkins 的主要特性和 Jenkins Pipeline 的基本知识。本导读使用“独立”的 Jenkins 发行版,它可以在您自己本地的机器上运行。

准备工作

第一次使用 Jenkins,您需要:

  • 机器要求:
    • 256 MB 内存,建议大于 512 MB
    • 10 GB 的硬盘空间(用于 Jenkins 和 Docker 镜像)
  • 需要安装以下软件:
    • Java 8 ( JRE 或者 JDK 都可以)
    • Docker (导航到网站顶部的Get Docker链接以访问适合您平台的Docker下载)

下载并运行 Jenkins

  1. 下载 Jenkins.
    http://mirrors.jenkins.io/war-stable/latest/jenkins.war
  2. 打开终端进入到下载目录.
  3. 运行命令 java -jar jenkins.war --httpPort=8080.【这可能是一个坑,真实的使用,应该跑在后台,让jenkins一直跑着】
  4. 打开浏览器进入链接 http://localhost:8080.
  5. 按照说明完成安装.

安装完成后,您可以开始使用 Jenkins!

文章来源:https://jenkins.io/zh/doc/pipeline/tour/getting-started/

进行防坑批注一

启动一个大坑,应该要长期跑在后台的!你可能需要更符合使用需求的

nohup java -jar /data/jenkins.war --httpPort=8080 &

如果你将jenkins与站点跑在一个服务器上,可能需要以下启动命令

nohup java -Dhudson.util.ProcessTree.disable=true -jar jenkins.war  --httpPort=8080 &

进行防坑批注二

war包跑起来,进到jenkins安装向导,报错

无法连接到Jenkins​

​解决方案:需要连接国外网络

好了,今天的防坑批注就到这里了!

关注公众号,看防坑批注

发表在 未分类 | 留下评论

JBlog自动构建环境搭建 实战练习jenkins+sh+spring+java+github webhook 自动构建博客系统

今天实战练习了一下jblog的全自动构建环境配置,演练了一下jenkins安装配置,github webhook配置,sh脚本调整,一点点把jblog的全自动构建环境配置好!之所以搭建一个全自动构建环境,这是CI/CD系统学习之路的开端,终点是要消化一套支持java,ios,android.net的全能自动构建系统,有兴趣的可以关注公众号,坐等分享。

使用到的参考文章:

快速组建Java项目持续集成环境

https://github.com/guohai163/jblog

https://github.com/Lancker/jblog

服务器

https://jblog.joke.dog/

https://www.vultr.com/?ref=8078200   (大概30元一个月,就可以拥有一个自主实验环境,各种操作系统任性安装与更换)

相关脚本

安装jdk (免费的openjdk)yum install java-1.8.0-openjdk* -yjava -version导入环境变量vim /etc/profile---修改在尾部追加export JAVA_HOME=/usr/lib/jvm/javaexport CLASSPATH=.:$JAVA_HOME/lib/dt.jar:$JAVA_HOME/lib/tools.jar:$JAVA_HOME/jre/lib/rt.jarexport PATH=$PATH:$JAVA_HOME/bin安装maven (jenkins也可自动安装,可以跳过)yum -y install wget (如果没有wget可以安装一下)wget http://mirrors.cnnic.cn/apache/maven/maven-3/3.5.4/binaries/apache-maven-3.5.4-bin.tar.gztar -zxvf apache-maven-3.5.4-bin.tar.gzvi /etc/profileexport MAVEN_HOME=/data/apache-maven-3.5.4export PATH=$MAVEN_HOME/bin:$PATHsource /etc/profilemvn -version

操作步骤

一、安装jenkins

wget http://mirrors.jenkins.io/war-stable/latest/jenkins.war

后台启动

nohup java -Dhudson.util.ProcessTree.disable=true -jar jenkins.war  --httpPort=8080 &

划重点:nohup一直执行,末尾的&是后台执行,java后带的参数指的是构建退出不要把相关的进程杀掉。

PS:这种情况出现在,构建机器与生产机器合用的情况,如果是远程到另一台机器,就不会有这个问题!可以使用另一种启动脚本

nohup java -jar /data/jenkins.war --httpPort=8080 &

依据提示登陆到jenkins安装界面,启动安装报错

无法连接到Jenkins 想不到需要连接国外网络!连上国外网络后,正常安装。

二、配置构建

2.1 jenkins job配置

采用Pipeline script form SCM,脚本直接在git配置中的Jenkinsfile文件中。

2.2 解读Jenkinsfile

pipeline {  agent any  environment {    //目标服务器IP以及登陆名    TAG_SERVER = 'guohai@guohai.org'    //目标服务器程序部署路径    TAG_PATH = '/data/jblog.guohai.org'    //目标服务器启动停止springboot脚本路径    TAG_SCRIPT = '/data/spring-boot.sh'  }  stages {    //构建块    stage ('build') {      steps {         script{            //获得maven程序路径            def mvnHome = tool 'maven 3.6.0'            //打包            sh "${mvnHome}/bin/mvn clean package"            echo "build over"         }      }    }    //联署块    stage ('deploy') {        steps {            //计算本地文件MD5            sh "md5sum ${WORKSPACE}/target/*.jar"            //因为我们要使用私钥来操作远程服务器内容,下面的代码块需要使用withCredentials括起来,其中credentialsId为在Jenkins里配置的证书。keyFileVariable为代码块中可以使用的变量名            // withCredentials([sshUserPrivateKey(credentialsId: 'guohai.org', keyFileVariable: 'guohai_org_key', passphraseVariable: '', usernameVariable: '')]) {                //拷贝本地JAR文件到服务器上               // sh "scp -i ${guohai_org_key} ${WORKSPACE}/target/*.jar ${TAG_SERVER}:${TAG_PATH}/${JOB_BASE_NAME}.jar"                //计算拷贝到服务器上的文件 MD5,确保与本地一致。避免因传输产生的错误。              //  sh "ssh -i ${guohai_org_key} ${TAG_SERVER} md5sum ${TAG_PATH}/${JOB_BASE_NAME}.jar"                //使用脚本重启spring boot              //  sh "ssh -i ${guohai_org_key} ${TAG_SERVER} ${TAG_SCRIPT} restart ${TAG_PATH}/${JOB_BASE_NAME}.jar"             //  }              sh "${TAG_SCRIPT} stop ${TAG_PATH}/${JOB_BASE_NAME}.jar"              sh "cp ${WORKSPACE}/target/*.jar ${TAG_PATH}/${JOB_BASE_NAME}.jar"              sh "md5sum ${TAG_PATH}/${JOB_BASE_NAME}.jar"              sh "${TAG_SCRIPT} restart ${TAG_PATH}/${JOB_BASE_NAME}.jar --spring.config.location=/data/config/application.yml"         }    }  }}

因为是同一台机器上进行自动构建与发布,所以对Jenkinsfile进行了适当调整,注释掉了跨服务器拷贝jar包的操作,新写了cp在当前服务器进行操作的sh脚本。真实的环境,应该是将构建服务器与生产服务器分开,所以这里仅注释掉,想在生产环境尝试的小伙伴,可以试试。具体可以参考快速组建Java项目持续集成环境 。

2.3 站点重启bash脚本

Jenkinsfile仅完成jar传输,真正对站点进行重启操作还靠sh脚本完成。这个过程尝试了好多次,寻找了好久的问题。对原始的spring-boot.sh进行了调整,让其支持指定启动配置文件。

#!/bin/bashSpringBoot=$2startConfig=$3echo $startConfigif [ "$1" = "" ];then    echo -e "\033[0;31m 未输入操作名 \033[0m  \033[0;34m {start|stop|restart|status} \033[0m"    exit 1fiif [ "$SpringBoot" = "" ];then    echo -e "\033[0;31m 未输入应用名 \033[0m"    exit 1fifunction start(){    count=`ps -ef |grep java|grep $SpringBoot|grep -v grep|wc -l`    if [ $count != 0 ];then        echo "$SpringBoot is running..."    else        echo "Start $SpringBoot success..."        BUILD_ID=dontKillMe nohup java -jar -Dlogging.path=/data/logs  $SpringBoot $startConfig  > /data/logs/nohup.out 2>&1 &    fi}function stop(){    echo "Stop $SpringBoot"    boot_id=`ps -ef |grep java|grep $SpringBoot|grep -v grep|awk '{print $2}'`    count=`ps -ef |grep java|grep $SpringBoot|grep -v grep|wc -l`    if [ $count != 0 ];then        kill $boot_id        count=`ps -ef |grep java|grep $SpringBoot|grep -v grep|wc -l`        boot_id=`ps -ef |grep java|grep $SpringBoot|grep -v grep|awk '{print $2}'`        kill -9 $boot_id    fi}function restart(){    stop    sleep 2    start}function status(){    count=`ps -ef |grep java|grep $SpringBoot|grep -v grep|wc -l`    if [ $count != 0 ];then        echo "$SpringBoot is running..."    else        echo "$SpringBoot is not running..."    fi}case $1 in    start)    start;;    stop)    stop;;    restart)    restart;;    status)    status;;    *)    echo -e "\033[0;31m Usage: \033[0m  \033[0;34m sh  $0  {start|stop|restart|status}  {SpringBootJarName} \033[0m\033[0;31m Example: \033[0m\033[0;33m sh  $0  start esmart-test.jar \033[0m"esac

其中startConfig是新增加,为了方便查看启动日志,调整了启动脚本。

一个是将输出定位到/data/logs/nohup.out,另一个则是开启了spring log.

BUILD_ID=dontKillMe nohup java -jar -Dlogging.path=/data/logs  $SpringBoot $startConfig  > /data/logs/nohup.out 2>&1 &

三,Github远程激活构建

提交代码后,让构建自动执行,省去人肉点。github提供了webhook功能。

3.1 找到jenkins的git webhook 配置

管理Jenkins->系统配置->git 高级,选择”为 Github 指定另外一个 Hook URL

3.2 在github的仓库里找到项目的webhook配置,将刚才找到的url填写进去
收尾
今天的实验遇到的问题有几个,别人1小时能搞定的时候,花了一天啦!看看都有哪些坑?1,就是站点部署脚本跑完后,站点自动关掉了。这个是因为站点与构建环境在一台服务器上,jenkins部署脚本跑完后,启动的服务被关掉了。找到一串启动参数搞定。2.部署启动脚本,不支持指定配置文件,经过改造后支持了。
预告
这是持续集成系列的开端,到java,ios,android.net的全能自动构建系统,到云打包平台!关注公众号,坐等最新​分享!
部署完成效果
在 github中提交代码后,会自动完成构建部署,可以看到最底下的版本号发生变化了!​

发表在 未分类 | 留下评论

开源博客JBlog安装实战 CentOS+openJDK+mySQL+maven+git=jblog.joke.dog

不忘初心,回归朴实​!JBlog相对于wordpress而言,极简​!做为一个新生代开源项目,拥有最最简单的功能组合,满足基本的博客发布​!回想使用 wordpress,也是最基本的博客发布功能,记录一些工作生活点滴,wordpress默认安装的风险还是比较大,基本上很容易被黑掉,而且国外“暴徒”很喜欢大面积发布垃圾言论​。因为这个原因,博客评论一直都没有开放,后台一堆垃圾评论!

JBlog简简单单的,还可以在此基础上添加一些自主的功能​!今天分享一下,本次jblog安装实战的过程与脚本。

​服务环境:

CentOS  (国外) 大概30元一个月,就可以拥有一个自主玩耍的环境!

https://www.vultr.com/?ref=8078200

安装的时候直接可以使用Git 于是只需要安装jdk,maven,mysql

安装jdk (免费的openjdk)yum install java-1.8.0-openjdk* -yjava -version导入环境变量vim /etc/profile---修改在尾部追加export JAVA_HOME=/usr/lib/jvm/javaexport CLASSPATH=.:$JAVA_HOME/lib/dt.jar:$JAVA_HOME/lib/tools.jar:$JAVA_HOME/jre/lib/rt.jarexport PATH=$PATH:$JAVA_HOME/bin安装mavenyum -y install wget (如果没有wget可以安装一下)wget http://mirrors.cnnic.cn/apache/maven/maven-3/3.5.4/binaries/apache-maven-3.5.4-bin.tar.gztar -zxvf apache-maven-3.5.4-bin.tar.gzvi /etc/profileexport MAVEN_HOME=/data/apache-maven-3.5.4export PATH=$MAVEN_HOME/bin:$PATHsource /etc/profilemvn -version

mysql采用面板安装,本次不做介绍,感兴趣的同学可以回复mysql获取进一步的了解。

安装好基础环境,就可以依据jblog官方的安装步骤进行操作了:

编译jblog jar包git clone https://github.com/guohai163/jblog.gitcd jblogmvn clean package修改配置文件cp src/main/resources/application.yml /{workspaces}/config/vim /{workspaces}/config/application.ymlmysql -u jblog -p jblog < init.sqlcp target/jblog-[version].jar /{workspaces}/jblog.jarnohup java -jar jblog.jar --spring.config.location=/{workspaces}/config/application.yml &

小插曲

jblog采用了对数据库密码进行了加密,文档里有没有提到怎么进行加密处理。找到jblog发起人,解决了问题,可以暂时关掉加密​。只需要去掉默认的2​行配置。

server:  port: 8002  tomcat:    uri-encoding: UTF-8spring:  datasource:    type: com.alibaba.druid.pool.DruidDataSource    druid:      url: jdbc:mysql://blog.db:3306/jblog?useUnicode=true&characterEncoding=UTF-8&allowMultiQueries=true      username: blog      password: 写明文密码      filters: config //删除      connection-properties: config.decrypt=true;config.decrypt.key=MFwwDQYJKoZIhvcNAQEBBQADSwAwSAJBAIBPhQVdNkfef9JUWlDYkL1DMhlfEzOiYEMyLO8gIY1gqOtL4+sUk06679uu7wT4WfDMRvVX5hA330/nr2e5vm8CAwEAAQ==//删除  freemarker:    template-loader-path: classpath:/web/    cache: false    charset: UTF-8    content-type: text/html    suffix: .ftl    check-template-location: true    expose-request-attributes: true    expose-session-attributes: true    request-context-attribute: requestmybatis:  configuration:    map-underscore-to-camel-case: truelogging:  level:    jblog.guohai.org.dao: debugmy-data:  #blog名称  blog-name: 海眼看世界  #blog作者  blog-author: H!Guo  #twitter账号  blog-twitter: freeguo  #blog二维码  blog-qrcode: https://guohai.org/assets/wechat.jpg

Jblog相关的问题都可以直接关注jblog发起人的公众号进行咨询,非常适合.net转java或新手进行练习!大神领队,各种问题都可以咨询!

巧妙拆分bolt提升Storm集群吞吐量

技术岛公众号

技术岛公众号

发表在 未分类 | 留下评论

一个状态机的实现之路 没写过状态机还没看过状态机飞?带资深小白围观状态机的实现过程


通常来讲,状态机的实现有别人家的状态机,还有自己家的状态机!今天要分享的是同事家的状态机!状态机可以理解为维护对象行为,流转对象状态的代码组织方式!状态机能做的事情,普通的代码写法也能达到,使用状态机,更多考虑后期的可维护性!真的是好维护么?好维护的前提是理解状态机的实现​!状态机的实现是有很多种,这里仅介绍工作中同事实现的一个结果,与自己的理解​。采用大话状态机的​形式展开!

在荒岛上,有只企鹅(后续简称为QE),这只QE有三种状态,开心状态、休眠状态、满血状态,要达到开心状态,则要打豆豆,要达到休眠状态,则要睡觉,要达到满血状态,则要​吃饭。开心状态的时候,可以通过睡觉,转化为休眠状态。满血状态的时候,即可以通过睡觉,转化为休眠状态,也可以​通过打豆豆,转化为开心状态。

从状态机的角度来看这只QE的生活状态,就是吃饭、睡觉​、打豆豆。不同的行为会让这只QE进入不同的状态。

这只QE深信开心的时候不能吃饭,不然会被咽死,所以开心状态不能通过吃饭这个动作转化为满血状态​。睡觉的时候,不能吃饭、不能打豆豆,所以有了上面这个调整后的状态机​图示。图示解密了状态机的以下特征:

  1. 进入某个状态,是要执行相应的个动作。目前来看,一个抵达特定状态,要执行一个特定的动作。
  2. 状态之间可以存在转化关系​。有单向、多向的转化存在,视QE的信仰​而定。
  3. 单一​职责。每个状态处理器,包括了状态变化的所有动作,但是,其中一个动作是对应转化为当前状态所需做的​动作。比如QE的开心状态处理器,打豆豆是转化为开心状态所需做的动作。吃饭虽然也在开心状态处理器中,但是QE不会这么干!标黑,意味着,开心状态下不会去做吃饭这个动作,纵使QE有这个动作​。睡觉也在QE开心状态处理器,但是开心状态处理器,只管开心相关的动作,遇到睡觉,则将动作转到​休眠状态处理器。

采用状态机的方式来看QE的生活,用状态机代码模拟EQ生活的时候,可以很好的应对QE文化的变迁。状态之间的转化调整也很好实现。比如QE突然发现,开心时吃饭并不会被咽死,于是,QE生活状态机​发生了小小的变化。

开心状态处理器只需要将吃饭这个动作转交给满血状态处理器,执行吃饭,即可满足一次文化大变迁。如果QE有新的状态新的动作出现,比如说清醒状态,相应的动作为起床,那么,所有的状态处理器,都需要补上缺失的起床动作。

状态之间的变化在于QE生活的习惯,QE的世界没有睡懒觉的习惯,所以清醒状态下,不能又​接着睡觉。但是清醒状态下,可以吃饭、可以打豆豆。

故事讲到这里,大概了解到了QE生活状态机的​来龙去脉了。采用状态机描述QE状态变化,能较好的适应变化​。每个状态处理器遵循了单一职责,易于​维护与扩展。如何采用Java代码实现这样一个状态机​呢?关注公众号,且​听下回分解!

技术岛公众号

技术岛公众号


发表在 未分类 | 留下评论